How to Prepare for Color Grading?
A clean editorial conform workflow is the bridge between editing and finishing. “How to preare for color grading” guide shows editors how to prepare locked picture timelines that transfer seamlessly into color grading, sound, and master delivery. As a Senior Colorist and Finishing Supervisor, I’ve seen how clarity, naming, and structure can save hours and prevent costly errors downstream.
A Guide for Editors Prepping Locked Picture Timelines for Color and Finishing
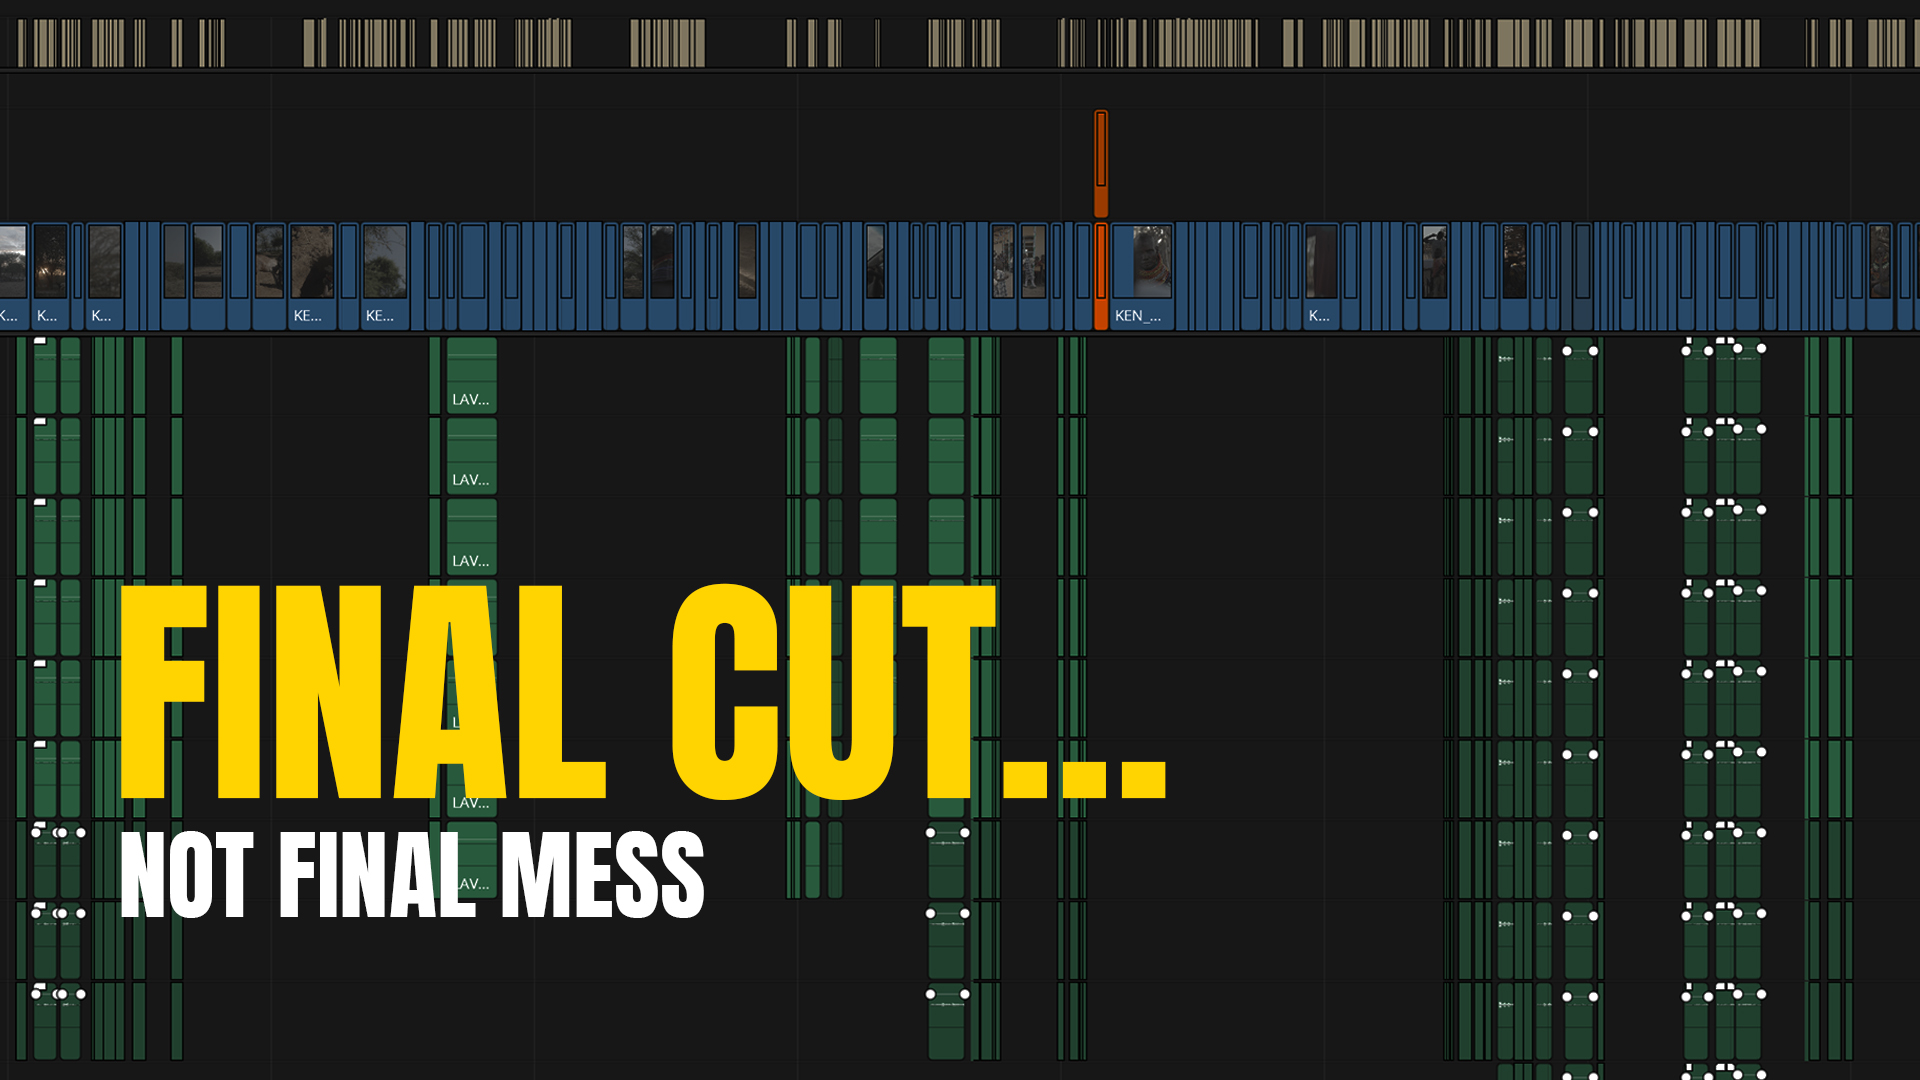
Over the years, I’ve conformed hundreds of timelines from editorial to final grade and master. When the timeline is clean, organized, and properly prepared, the color and finishing teams can dive straight into the creative work. When it’s messy – we spend hours just untangling problems that could’ve been solved upstream.
This guide is for editors and assistant editors who want to be trusted and re-hired by colorists, mixers, and post supervisors. Follow these principles, and your timeline will move smoothly from edit to finishing.
Treat the Timeline Like a Blueprint, Not a Sandbox
DO:
- Flatten nests / compound clips (unless discussed).
- Lock all edit decisions: no placeholders, temp shots, or “maybe use this” alternates.
- Use a timeline that matches the project master resolution and framerate (not proxies or weird custom resolutions).
- Keep cuts at zero-crossings of audio, no weird subframe trims.
DON’T:
- Leave disabled clips, blank gaps, or random slugs.
- Deliver a proxy timeline or offline resolution without OCF reference.
- Assume “it’s obvious what I meant” – clarity is key.
Name It Like You Mean It
Use naming conventions that tell us where the footage came from. Proper file labeling should be applied as early as the data management stage, immediately after copying OCF from the recording devices.
For Data Management: Best Practices, see my latest post.
For example:
SSD_R5C_15062025_A095C810
KEN_DJIMAVIC_17062025_MVI_1234
LBN_FS7M2_12022025_161_1949
This helps:
- Automatically link to camera originals. This also helps ensure unique and non-repeating clip names, which is critical for a clean conform and easy relinking.
- Sort footage by day/location/device.
- Create grouped nodes by camera or date for grading.
- Avoid duplicate filenames across cards or devices. All clip names must be globally unique to prevent cross-links or failed conforms.
Video Tracks in the Timeline
Video tracks:
- Flatten video tracks to a single layer if possible – it’s a huge timesaver for both conforming and color grading.
- Keep visual overlays (like text, timecode, watermarks) on separate upper tracks and disable them before conform if not part of final master.
- Avoid stacking unnecessary clips across multiple tracks unless required for editorial intent.
- Use consistent track order across all sequences for easier relink and batch processing.
Don’t leave temp grades, weird LUTs, or opacity tricks active. If you used any effects that MUST stay (e.g. timewarps or repositioning), bake them in and notify the colorist.
Audio Track Logic
Track order and naming:
- Maintain a consistent audio track order: A1 for interviews, A2 and subsequent tracks for dialogue, followed by sound effects (SFX), and music tracks placed at the bottom.
- Name your audio tracks clearly (INTV, DIA, SFX, MX) – not “Audio 1, Audio 2…”
- Use consistent track structure across all sequences to simplify conform and mixing.
Check:
- No random hard pans.
- Proper sync (especially with dual-system sound).
- Remove muted tracks or temp VO unless essential to the cut.
- Avoid empty audio tracks – clean them up before export.
- Match project-wide channel layout conventions (mono, stereo, dual mono, etc.).
Export Checklist for Conform
If any clips use retiming (speed changes, freeze frames, ramps, or optical flow), they must be rendered with handles and labeled clearly. All baked clips should retain their original timecode when possible.
AAF/XML:
- Export clean XML or AAF with no effects or speed ramps unless baked.
- Include source filename and timecode metadata (not “new clip” names).
Reference Picture:
- H.264, ProRes Proxy / LT, DNxHD, or H.265
- Burn-ins: include timeline timecode, source timecode, clip name, audio timecode, frame count, reel name, version number, and relevant editorial notes (e.g., 120% speed ramp, +10% zoom, baked timewarp).
- Optional watermark.
Audio:
- Provide the full reference mix exactly as intended by the editor and director – this should reflect the final creative intent for how the film should sound.
Project Folder:
- Implement a clear and consistent folder structure within your media management system. Standardizing this structure across all projects improves team familiarity and enables easier automation of workflows.
For example:
/01_XML_AAF/
/02_REFERENCE_VIDEO/
/03_AUDIO_MIXES/
/04_STEMS/
/05_INFO_NOTES/
/06_GFX/
Deliver all materials inside a single parent folder clearly named by project and version, e.g.: SSD_DOC_EP1_V3_LOCK. Include a camera format overview listing codec, resolution, and color profile for each recording device.
Notes That Save Hours
Include a simple .txt or .pdf with essential documentation:
- What’s been baked in and why
- Audio configuration and final mix info
- Offline – online relink logic
- Color pipeline expectations (e.g., Rec.709 vs. C-Log3 DWG)
- Summary of camera sources, codecs, frame rates, and gamma/color space settings
- Any known issues
Remember: Delivery Is a Team Sport
When you prep your timeline like a professional, you’re not just finishing an edit – you’re handing off the baton to color and finishing. Every clean cut, every clear label, every organized folder – it all speeds up the final stage and helps the project shine.
And we will notice.
How much of your week goes to work that doesn’t need you?
Relinking, renames, conform, the same delivery spec for the tenth time. FORGE learns how your studio works and takes them off the floor, so your hours go to the work that needs a person in the chair. First call is free – 30 minutes, questions, no pitch.